How to Install Jenkins on Linux – Simple & Easy Step-by-Step Guide (2026)
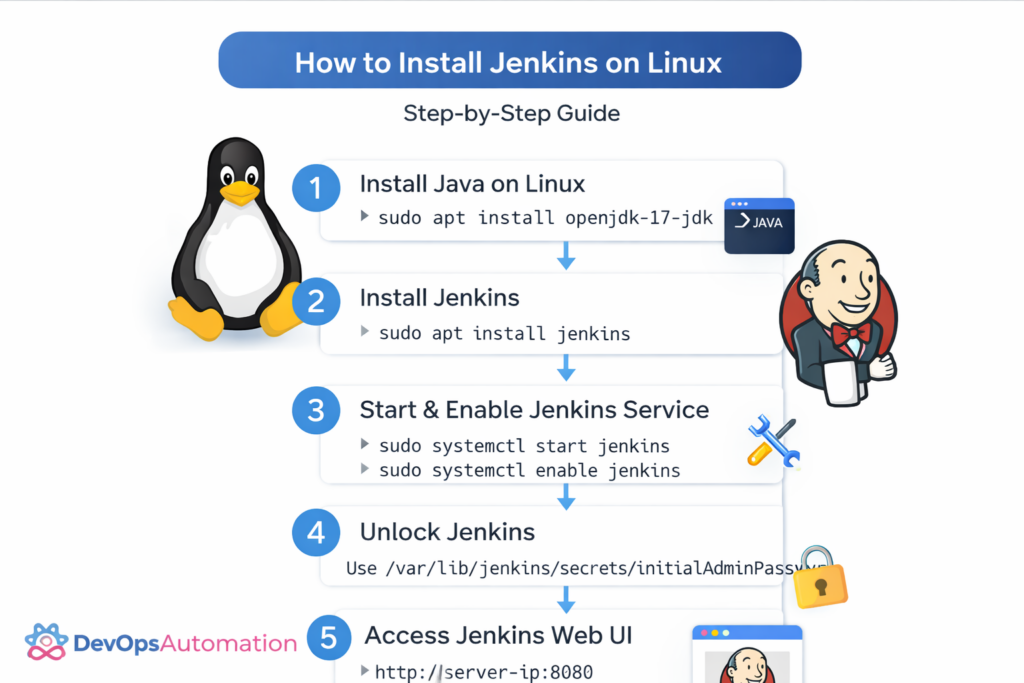
Installing Jenkins on Linux is one of the first practical steps every DevOps beginner should learn. Jenkins is the most widely used CI/CD automation tool, and Linux is the most common platform where Jenkins runs in real-world environments.
In this detailed guide, you’ll learn how to install Jenkins on Linux step by step, even if you are a complete beginner.
By the end of this article, you will understand:
- Prerequisites for installing Jenkins
- How Jenkins works on Linux
- Step-by-step Jenkins installation
- How to access Jenkins UI
- Post-installation setup
- Common installation issues and fixes
This guide explains how to install Jenkins on Linux step by step, even if you are a complete beginner.
Let’s begin.
? Prerequisites to Install Jenkins on Linux
Before installing Jenkins, make sure your Linux system meets these requirements:
? System Requirements
- Linux OS (Ubuntu, Debian, Amazon Linux, CentOS, RHEL)
- Minimum 2 GB RAM (4 GB recommended)
- At least 10 GB free disk space
- Root or sudo access
? Required Software
- Java (Jenkins runs on Java)
- Internet access to download packages
? If you are new to Linux, read:
Linux fundamentals for DevOps engineers

? Step 1: Install Java on Linux
Many beginners struggle when learning how to install Jenkins on Linux, mainly due to Java or firewall misconfiguration.
Jenkins requires Java to run.
? Check if Java is Installed
java -version
If Java is not installed, install OpenJDK.
? Install Java on Ubuntu/Debian
sudo apt update
sudo apt install openjdk-17-jdk -y
? Verify Java Installation
java -version
You should see Java version output.
? Step 2: Add Jenkins Repository
To install the latest stable Jenkins version, add the official Jenkins repository.
? Import Jenkins GPG Key
curl -fsSL https://pkg.jenkins.io/debian-stable/jenkins.io-2023.key | sudo tee
  /usr/share/keyrings/jenkins-keyring.asc > /dev/null
? Add Jenkins Repository
echo deb [signed-by=/usr/share/keyrings/jenkins-keyring.asc]
  https://pkg.jenkins.io/debian-stable binary/ | sudo tee
  /etc/apt/sources.list.d/jenkins.list > /dev/null
? Step 3: Install Jenkins on Linux
Update package list and install Jenkins.
sudo apt update
sudo apt install jenkins -y
This installs Jenkins and configures it as a system service.
?? Step 4: Start and Enable Jenkins Service
? Start Jenkins
sudo systemctl start jenkins
? Enable Jenkins on Boot
sudo systemctl enable jenkins
? Check Jenkins Status
sudo systemctl status jenkins
You should see Jenkins running.
? Step 5: Allow Jenkins Port in Firewall
Jenkins runs on port 8080 by default.
? Allow Port 8080 (Ubuntu UFW)
sudo ufw allow 8080
sudo ufw reload
If firewall is disabled, you can skip this step.
?? Step 6: Access Jenkins Web Interface
Open your browser and visit:
http://<your-server-ip>:8080
You will see the Unlock Jenkins screen.
? Step 7: Unlock Jenkins
Jenkins creates an initial admin password during installation.
? Get Initial Password
sudo cat /var/lib/jenkins/secrets/initialAdminPassword
Copy the password and paste it into the browser.
? Step 8: Install Suggested Plugins
After unlocking Jenkins:
- Select Install suggested plugins
- Jenkins will automatically install essential plugins
- This may take a few minutes
These plugins enable Git, pipelines, credentials, and UI features.
? Step 9: Create First Admin User
Create your Jenkins admin account:
- Username
- Password
- Email (optional)
Save and continue.
? Step 10: Jenkins Installation Completed
Once setup finishes, you’ll see the Jenkins dashboard.
? Congratulations! Jenkins is now installed successfully on Linux.
? Understanding Jenkins Installation Architecture on Linux
When Jenkins is installed on Linux, it runs as a background system service managed by systemd. This means Jenkins automatically starts during system boot and continues running even after user logout. The Jenkins service runs under a dedicated system user called jenkins, which helps isolate permissions and improve security.
The Jenkins home directory is located at /var/lib/jenkins. This directory stores all important data such as job configurations, build history, plugins, credentials, and pipeline scripts. If this directory is lost or corrupted, Jenkins data will also be lost, which is why regular backups are critical.
Jenkins configuration files are stored in /etc/default/jenkins on Debian-based systems. This file controls environment variables such as the Jenkins port number, Java options, and memory limits. Jenkins logs are stored in /var/log/jenkins, which is the first place you should check if Jenkins fails to start.
Understanding how Jenkins is structured on Linux helps beginners troubleshoot issues faster and manage Jenkins confidently in production environments.
? Verifying Jenkins Installation with a Sample Job
After installing Jenkins on Linux, it is important to verify that it works correctly. The easiest way to do this is by creating a simple test job.
From the Jenkins dashboard, click New Item, enter a job name such as test-job, select Freestyle project, and click OK. In the job configuration page, scroll to the Build section and add a build step called Execute shell.
Inside the command box, add:
echo "Jenkins installation successful"
Save the job and click Build Now. If Jenkins is working correctly, the build will run successfully, and the console output will display the message.
This confirms:
- Jenkins service is running correctly
- Jenkins user has proper permissions
- Build execution works
- Web UI is functioning
Testing Jenkins immediately after installation is a best practice. It ensures your environment is ready before you start creating real CI/CD pipelines. Beginners who skip this step often face confusion later when pipelines fail due to basic setup issues.
? Jenkins User Permissions and Linux File Ownership
On Linux systems, Jenkins runs as a dedicated user named jenkins. This user must have the correct permissions to access build tools, directories, and scripts. Permission issues are one of the most common problems beginners face after installing Jenkins.
For example, if Jenkins needs to access Docker, Maven, or custom shell scripts, the jenkins user must be explicitly allowed to do so. You can check the Jenkins user using:
ps aux | grep jenkins
If Jenkins needs access to system resources, you may need to add the Jenkins user to specific Linux groups. For example:
sudo usermod -aG docker jenkins
After modifying user permissions, restart Jenkins:
sudo systemctl restart jenkins
Proper permission management ensures Jenkins pipelines run smoothly without security risks. Never run Jenkins as the root user, as this creates serious security vulnerabilities.
Understanding how to install Jenkins on Linux correctly helps avoid common setup and permission-related problems.
?? Common Jenkins Installation Mistakes Beginners Make
Many beginners face issues while installing Jenkins on Linux, not because Jenkins is difficult, but because small details are overlooked.
One common mistake is installing an unsupported Java version. Jenkins officially supports Java 11 and Java 17. Using older or newer versions can cause startup failures. Always verify Java compatibility before installation.
Another mistake is forgetting to open port 8080 in the firewall. Even if Jenkins is running, the web interface will not be accessible unless the port is allowed.
Beginners also forget to save the initial admin password or accidentally close the setup screen. If this happens, the password can always be retrieved from:
/var/lib/jenkins/secrets/initialAdminPassword
Understanding these common mistakes helps new users save time and avoid unnecessary frustration during Jenkins installation.
? Preparing Jenkins for Real CI/CD Pipelines
Installing Jenkins is only the first step. To prepare Jenkins for real CI/CD pipelines, a few additional c